Skip to content
  • Home
  • About
  • Services
    • Interiors
    • Exteriors
    • Restoration
    • Spray painting
    • Commercial
  • Blog
  • Gallery
  • Contact
-->
  • Home
  • About
  • Services
    • Interiors
    • Exteriors
    • Restoration
    • Spray painting
    • Commercial
  • Blog
  • Gallery
  • Contact

Category: DIY

Filling and sanding walls ready for painting or wallpaper

Posted on 31st January 20175th July 2018 by Louise Nelhams
Filling and sanding walls ready for painting or wallpaper

We’ve previously written a brief guide on preparing walls, but here we go into a little more detail on how to smooth the surface by applying filler and sanding walls to help you get that genuine pro-standard finish…

The main thing that separates the average amateur DIYer from the professional decorator is the attention to detail during the essential preparation stage. When it comes to painting or wallpapering a wall, every extra hour spent ensuring that the surface is as perfect as you can make it will increase your overall sense of satisfaction upon completion.

Washing the walls

The first step is to wash away some of the grime and paste left from previous wallpaper by sponging down with a sugar soap solution. This is a good idea even if the walls haven’t been papered before, because any wall in a living space will attract dust and grease over time, so don’t be tempted to skip this step!

Filling in the blemishes

If money is no object it’s always worth having the walls skimmed by a master plasterer before painting or decorating your walls, but this is an expensive solution and unnecessary if your current plaster is in reasonable condition. Fortunately, there are products on the market that make filling smaller to medium holes relatively easy for the layman.

wall with lots of filler
Some walls need a lot of filling!

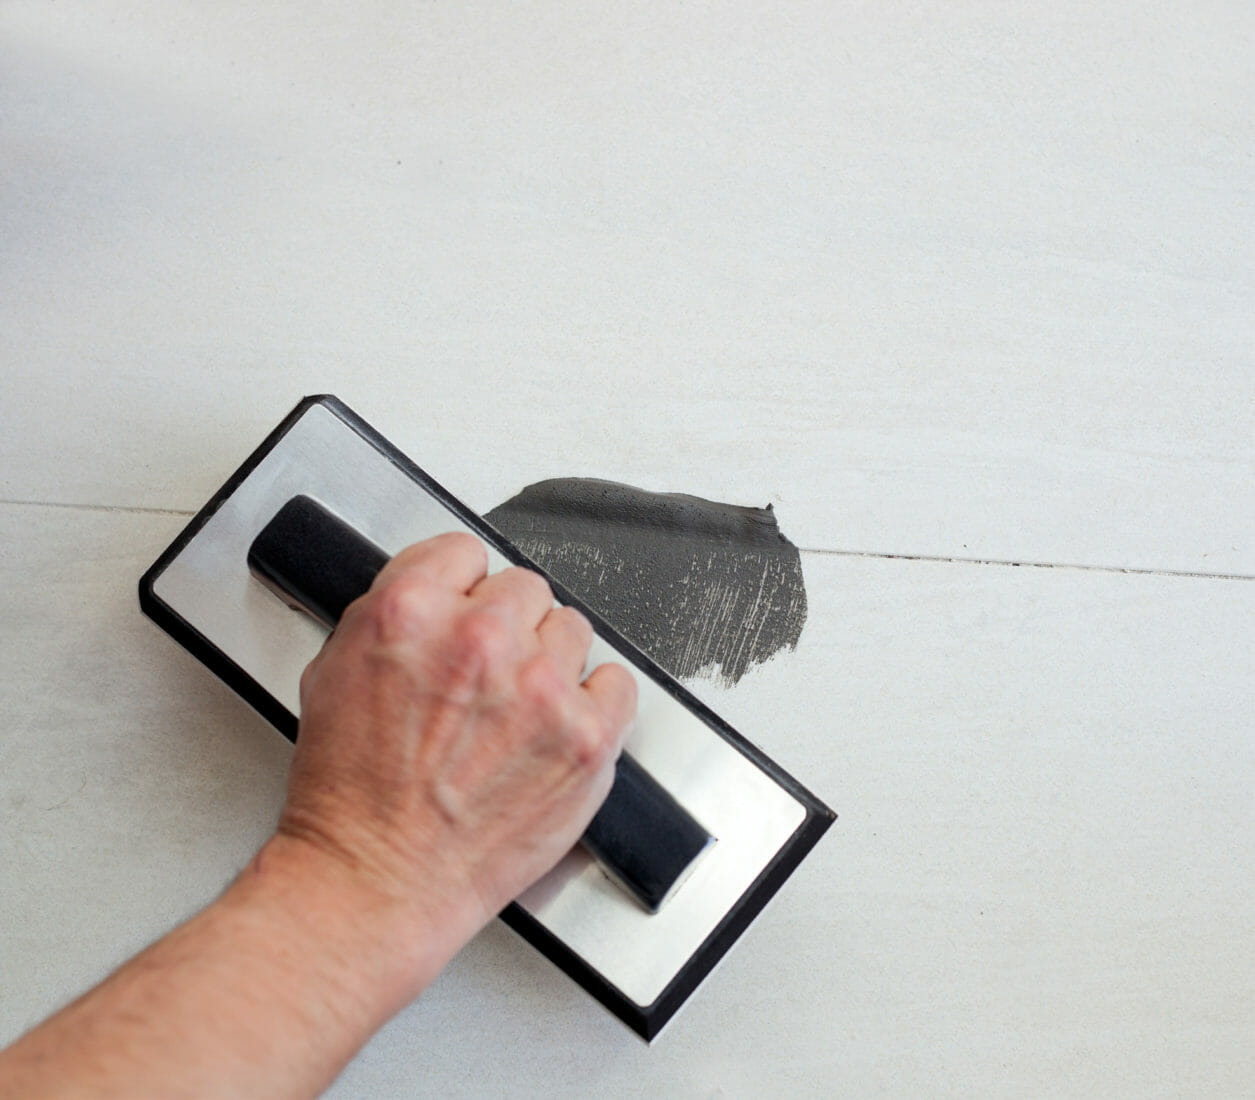
Gyproc Easi-Filler is easy to mix and use, dries quickly and sands down with the lightest of touches, making it ideal for the kind of blemishes you’re likely to find on your walls. It doesn’t shrink and sticks to most dust-free surfaces, but it has a tendency to dry out quite quickly so work fast! Oh, and wear a dust mask during the mixing stage because it’s a very fine powder.

Apply it with a plastering trowel for larger areas or a smaller decorator’s knives/wallpaper scraper for smaller holes. It’s dry to the touch within the hour on smaller areas, but large holes will need to be left overnight.

There are plenty of fillers on the market though, so do have a look in your DIY store to see what’s on offer!
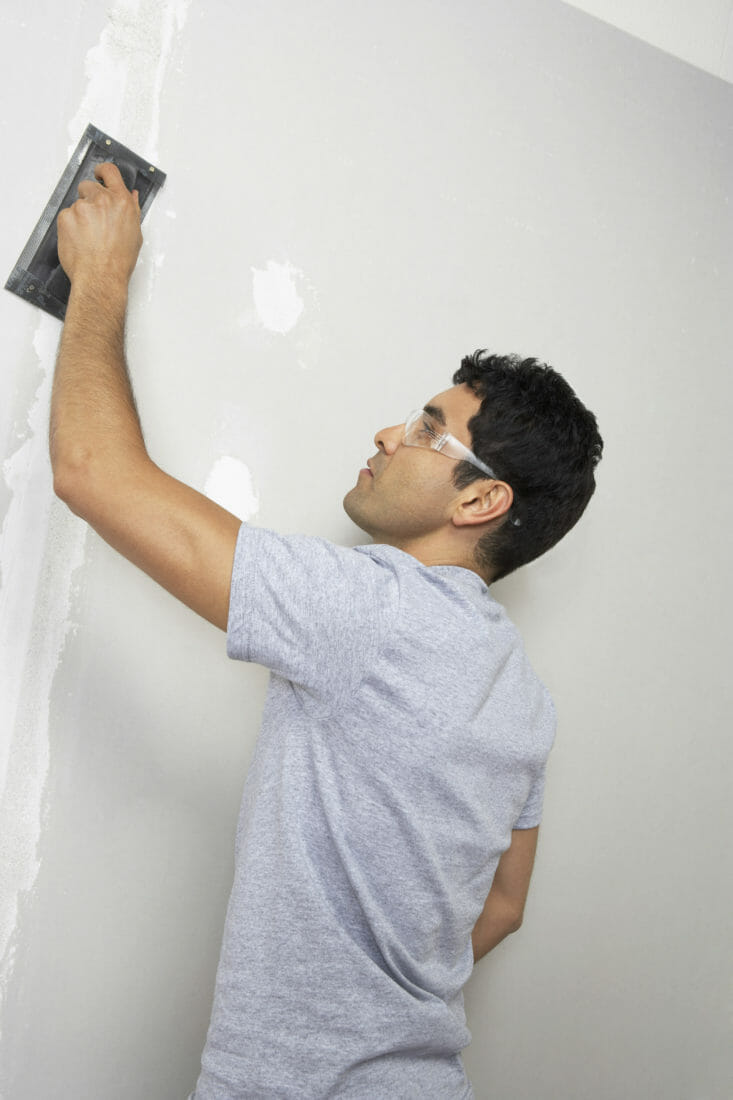
Sanding walls down

This is a satisfying job that will transform a tired old wall if you follow our advice and this is an essential step if you’ve had to fill holes in the plaster:

  • It’s important to wear a quality dust mask for this job – please don’t forget this!
  • The grade of sandpaper you require will depend on the state of your walls, but a general starting point of 70-grade will quickly remove the worst of the debris from your walls
  • Use a sanding block to ensure a flat sand, and work in a circular motion as you move across the surface
  • After your first fill and sand, check the walls again and fill any spots you missed
  • Repeat the sanding process but with 120-grade paper
  • Go over the entire wall, as a quick sand will help create a key for paint of paste
  • Once you’re happy that the walls are smooth you can wash them down again

If your wall’s very big, it might be worth using a quality brushless random orbital sander to make this job easier. Make sure that it has the option to plug into a vacuum cleaner unless you want to make a lot of mess!

Follow this simple guide to filling and sanding walls and yours will soon be in perfect condition for your wallpaper or paint – but if you’re unsure or uncomfortable with the process and live in the Leeds or Harrogate area, you can always drop us a line and ask for a quote to do it for you.

Categories

  • budget
  • colour trends
  • coving
  • decorating
  • decorating tips
  • decorator's varnish
  • DIY
  • DIY Projects
  • exterior decorating
  • How-to
  • Interior design
  • lining paper
  • paint brush
  • paint drying times
  • painting
  • painting exterior walls
  • painting fresh plaster
  • painting woodwork
  • repairing a concrete window sill
  • shabby chic
  • shabby chic decorating
  • stained glass
  • Stripping wallpaper
  • Uncategorized
  • varnish
  • wallpaper
  • wallpaper designs

Recent Posts

  • Decorating Trends for 2021
  • Bringing Life Into Your Home
  • Five Ways To Make Your Feature Wall Flourish
  • The Psychology Of Colour, And How To Use It!
  • Need Better Productivity? Redecorate Your Office!

Decorating colour trends for 2017

Posted on 23rd December 20165th July 2018 by Louise Nelhams
Decorating colour trends for 2017

If your New Year’s resolutions are more geared towards improving your living space than going to the gym then this is essential reading for you! This month we’re going to explore the forecasted decorating colour trends for 2017, so you can be sure that any design ideas you may be toying with are bang up to date.

Fortunately, colour trends don’t shift as quickly as high street fashion, so if you’ve decorated in 2016 there’s a good chance that your choice was a good one – but these are the colours grabbing the headlines amongst trendy interior designers.

Blue is the colour…

It may be the start of an old football chant, but in 2017 blue most definitely is the colour! Trend experts at Dulux have chosen Denim Drift as their colour of the year because ‘Blue is the colour of life; it is the clothes we wear, the sky we gaze at and the water that revitalises us,’ say Dulux. ‘Blue has been, and will continue to be, a constant in every aspect of our lives. From the deepest ink blue to the palest misty blue, this colour spans every spectrum of life; it is a royal colour, but it is also used for workers’ blue jeans.’

Dulux has created an entire complimentary palette around this key colour, allowing you the opportunity to use subtle warm shades of blue – something we often consider impossible – to create rich and welcoming, yet completely modern colour schemes in your home.

Terracotta

Terracotta colour in bathroom
Spice up your life with terracotta

We’ve always loved the warmth and welcoming depth of terracotta, but this year the trend is to move away from the rustic look into matte finishes for a clean and modern feel. Use sparingly on a feature wall to break up white or magnolia and add a touch of contemporary earthiness to a living space.

Blue-green

We’re seeing more and more interior designers talking about green again – not the rich forest greens that have always been popular in a living space or bedroom, but blue spectrum greens.

Traditionally used in bathrooms and kitchens, these colours can be a little cold if used in the wrong space, but we think it’s worth throwing caution to the wind and going for it! Accent them with bright orange furniture and splashes of colour to make your kitchen and bathroom the talk of the town!

Grey

Light grey has always been a perfect colour to build a room around because it’s so neutral and allows you to create contemporary styling with your furniture and soft furnishings. This year, however, designers are getting excited about the bolder use of matte mineral grey – a daring choice for a bedroom when accented with deep, rich reds and browns.

Living room in deep grey
Get bold with deep grey

Pantone’s Greenery

As eagerly anticipated as Dulux’s colour of the year is the choice of Pantone, and this year they’ve gone for as natural and grounding a green as we can ever remember.

Greenery will make you yearn for the first days of spring – a neutral yet natural green that works fantastically as a main colour or accent for some of the other bold choices we’ve mentioned.

We’re excited by the beautiful colour trends for 2017 that designers are moving towards, and hope to get the opportunity to work with you in turning your home into a stylish contemporary space that you can feel relaxed and comfortable in. If you want to chat with one of our decorating experts about any of these ideas you can contact us through our website or on Facebook or Twitter.

A guide to watching paint dry! Paint drying times for decorating

Posted on 29th November 20165th July 2018 by Louise Nelhams
A guide to watching paint dry! Paint drying times for decorating


There are many decorating jobs you can take on yourself, including painting and wallpapering, but it’s always essential to follow the correct procedure to produce a professional finish. We’re always talking about preparation and using the right tools for the job, but one factor you may not have considered is how long various paints and pastes take to dry before you can safely apply another coat. Here’s our guide to paint drying times to help you plan your decorating schedule…

Drying conditions

Obviously the ambient room temperature and humidity will be a major factor in drying time – a warm summer day with the windows open will allow paint or paste to dry much quicker than a cold and wet evening in January. The ideal drying temperature for most paints is about 21°C, so if it’s colder and more humid you need to recognise that the liquids in the paint or paste will evaporate more slowly.

Temperature showing as 21 degrees

Emulsion paint drying times

Water based emulsions dry the quickest and you can expect them to be touch dry in roughly 1-2 hours, but don’t add a second coat for another four hours for the best finish because your roller or brush could still pick up the first coat and create streaks.

Eggshell paint drying times

These paints are popular in kitchen and bathroom areas because they offer greater durability than a matt or satin emulsion – but that means they require longer drying times. In a typical scenario, these paints will be touch dry in 4-6 hours and ready for you to apply a second coat in 16-24 hours. It’s probably even more important to sit on your hands and remain patient with these paints before your second coat because they’re much more prone to pulling.

Gloss paint drying times

Stronger solvent based paints are excellent for your skirting boards, doors, window frames and radiators because they’re exceptionally hard-wearing. Allow a good 4-6 hours for these to be touch dry and 16-24 hours before you think about applying the second coat.  All solvent based paints should be applied with plenty of ventilation unless you want a headache from the fumes, so remember to open those windows!

Wallpaper paste drying times

Paste drying times are also quite varied and have a lot to do with the thickness and weight of the wallpaper you’re using, as well as the quality of the surface. Because there are so many factors, it’s best to err on the side of caution and watch for signs of a dry paper. If the paper feels bone dry to the touch it probably is, but also watch for any small bubbles being pulled flat to the wall as this is a great indicator that the paper is ready for paint. If you’re in any doubt, however, leave it overnight.

We hope this guide hasn’t been as boring as watching paint dry, but if you’re still not confident of achieving a perfect finish give us a call for advice or a no obligation quote – we’re happy to help!


Colours and moods – using colour to change the feel of your room

Posted on 31st October 20165th July 2018 by Louise Nelhams
Colours and moods – using colour to change the feel of your room


When it comes to decorating your home there are always decisions to make, but did you know that your choice of colour can have a big influence on how you feel when using a space? This month on our blog we’re going to show you how to understand the psychology of and link between colour and moods, so that you can make better interior design decisions.

How does colour affect a room?

All colours are not equal. Bright and bold colours are considered active because they excite and stimulate the mind and senses, and may be useful in encouraging creativity. Cooler, more muted colours are considered passive because they relax the mind and may improve our ability to focus. Neutral colours such as white and magnolia have less effect on mood, but do help create a sense of space.

Choose your colours wisely

Making a decision based on your favourite colour may seem like a wise move, but you could find yourself choosing something inappropriate for creating the ambiance you’re looking for. Let’s have a quick look at the basic properties and potential uses of each colour:

  • Red – This powerful and stimulating colour is a good choice for a dining room or lounge where people gather together because it encourages conversation and raises the energy of the people in the room. Like all darker and richer colours, it’s also great for making a large room feel more inviting and snug. It’s a good idea to avoid using red in the bedroom if you plan on getting a good night’s sleep!
  • Yellow – Used sparingly, yellow adds a touch of brightness and freshness to any room, making it ideal for bathrooms and kitchens. Think carefully before using it as a main colour though because studies have suggested that it may provoke feelings of anger and frustration – not the ideal mood when there are sharp objects around!
  • Green – No other colour promotes feelings of restfulness and tranquillity like green.
    It soothes the eyes and calms the mind, making it a perfect colour for a bedroom, or any space you want to use for relaxation.
  • Blue – Another calming colour often used in bedrooms and nurseries, but be careful to choose your shade carefully. Light blues can make a room feel cold, so balance them with warmer coloured soft furnishings. Darker blues have to be used sparingly because they can make a room feel sad, so it’s better to use them on smaller feature walls.

Other colours such as orange and purple add a zesty and quirky feel to any room. Used with caution they will give a primarily neutral room a bit of spark and character, so don’t be afraid to try them out.

Red wall in living room
Red can make a room feel cosy

Neutral colours never go out of fashion

The beauty of basing your colour schemes on the neutral colours – grey, black, white and brown – is that they all work as a base for further experimentation and allow you to change the feel of your rooms with soft furnishings, curtains and feature walls. Be careful with your use of black, though, or you might find the walls pressing in on you!

We hope you’ve enjoyed this article on the psychology of colours and moods, and how to apply it to your next interior design or decorating project, but if you feel that you need some professional help, we’re always here to offer our advice.


Quick guide on how to wash paintbrushes

Posted on 28th September 20165th July 2018 by Louise Nelhams
Quick guide on how to wash paintbrushes


If you’re a regular reader of our blog, you’ll notice that we’re always talking about the importance of preparation when starting a decorating project. Apart from the obvious skill difference, this is one of the steps that separates the amateur from the professional – the other one is how you take care of your equipment.

This month we’re going to give you our top tips on taking care of these crucial tools so that they’ll give you years of great service. Here’s a quick guide on how to wash paintbrushes after (and during!) use…

Should I keep them or ditch them?

There’s a temptation to buy cheap brushes and throw them in the bin after use, and while this is an option it’s not great for the environment or your decorating projects! In a previous blog where we offered our advice on choosing a paint brush, we talked about the false economy of buying cheap brushes – they’re often poorly made, drop bristles like an old Christmas tree, and leave streak marks in your finish. It’s definitely worth buying quality gear and taking care of it!

Washing brushes

Well done! You’ve finished your decorating and feel like putting your feet up, but ten minutes with your brushes at this point is time well spent:

  • Begin by scraping as much excess paint back into the tin as you can – waste not, want not!
  • For water-based paints, fill a bucket with warm soapy water and work as much of the paint out of the bristles with your fingers as possible.
  • Repeat this process with fresh soapy water until the brush is clean.
  • Flick the brush dry outdoors – do it inside another big bucket if you’re worried about spraying paint residue around the garden.
  • Repeat the cleaning and drying process in fresh water but without the soap.
  • Wrap the brush up in thick paper and store.

Washing paintbrush in water

Oil-based paints will require thinners, but don’t be tempted to soak your brushes because you’ll risk damaging the bristles. Follow the same basic process as with water-based paint:

  • Scrape off excess paint.
  • Pour the manufacturer’s recommended thinners into a small tub.
  • Dip your brush up and down and swirl around to work the thinners into the bristles – don’t use your hands!
  • Shake off into a big bucket or safe open space.
  • Repeat the cleaning and drying process again with fresh thinners.
  • Wrap the brush in paper and store.

If you follow this simple process your brushes should serve you well for years, but you can increase their life further by always using the same brushes for water and oil based paints – mixing them up will make them harder to clean and damage the bristles.

Storing during the job

If you’re in the middle of a big decorating project, it’s not necessary to clean your brushes every night – but you will need to store them in a manner that doesn’t ruin them. Scrape off any excess paint, wrap them in clingfilm and use masking tape around the handles to keep them airtight overnight. They’ll be perfectly usable the next day.

Congratulations! You’ve taken another step towards decorating like a pro and can now relax with that cup of tea knowing that next time you need those brushes they’ll be in tip-top condition!


How to wallpaper around windows

Posted on 30th August 20165th July 2018 by Louise Nelhams
How to wallpaper around windows

With time, patience and proper preparation, it’s perfectly possible for most handy DIYers to do a decent job of wallpapering. However, there are areas where even the most diligent amateurs struggle to produce a professional finish. Last time on our blog we talked about wallpapering around tricky obstacles like light fittings and plug sockets, but they’re child’s play compared to trying to wallpaper around windows! This month we’re going to demystify this dark art for you.

Preparation


If you’ve been reading our blog for a while you’ll know that preparation is the key to success. Make sure that:

  • You have enough paper to cover your chosen area.
  • Your walls are clean and blemish free.
  • You have all the tools you need, such as sharp blades, pencils, tape measure, sharp scissors, spirit level, and pasting equipment.
  • You have a clear plan in mind before you hang your first sheet.

Windows are the most difficult obstacle to paper to a high standard, which is why we recommend starting with them so that you have total control of the overall process.

Example of someone wallpapering around a window


The method

We’ll take a fairly large window to begin with, but this applies equally to all sizes. Before you begin papering, read this set of instructions through a couple of times to be sure that you are clear on the method – a little like baking a cake!

  1. Begin on the right-hand side of the window with a strip of paper that overhangs the opening with enough paper to cover the inside reveal of the window.
  2. Cut the paper straight across the opening at the top and bottom so that you can neatly fold and paste the flap into the reveal.
  3. With a sharp blade carefully cut a section out so your strip fits snugly around the window sill – this is tricky so take your time – and hang the rest of the strip under the window down to the skirting board.
  4. Your next strip will hang from the ceiling down and under the head of the window with the corresponding strip going beneath the window sill to the floor.
  5. Repeat step 4 across the width frame if necessary.
  6. If you’re lucky, your final strip for the left hand reveal side will be large enough to simply repeat steps 1 and 2, but if not, cut a small flap for the reveal instead of a full sized one and paste it around the reveal corner.
  7. Now your task is to accurately measure and cut a strip of paper that fits the reveal and paste it in over the flap you just created. Be sure to match any pattern.
  8. Now cut small strips to fill the two gaps at either end of the head of the window. You can cut these with a small flap to fold up and under the end strips to create the neatest finish, but if this is too fiddly it’s okay to cut it to the edge.


We hope that this makes this tricky DIY task as manageable as possible, but if you find the idea overwhelming, call a professional decorating service like ours instead!


Tips for wallpapering around obstacles

Posted on 2nd August 20165th July 2018 by Louise Nelhams
Tips for wallpapering around obstacles

Wallpapering is definitely one of those home improvement jobs that the majority of people can handle, but you do need to be properly prepared and willing to take your time. This is especially true when it comes to the tricky task of wallpapering around obstacles, such as light fittings and plug sockets. This week we’re going to offer you our top tips to make these jobs as simple as possible.


Light switches and plug sockets


The first thing to do whenever you’re working anywhere near electricity is to turn the power off at your junction box. It’s pointless to take a risk with this, so plan your wallpapering session well to ensure that you have plenty of daylight.

  1. Once the power is turned off you can unscrew the cover plates and remove them, being careful to store any screws safely.
  2. Hang the wallpaper straight over the holes then cut diagonal lines from corner to corner with a sharp blade.
  3. Carefully cut the flaps away with sharp scissors, smooth down the edges and allow the paper to dry.
  4. Once dry you can refit the cover plates for the sockets and light switches.


lighting switch
Get a neat finish like this by following our advice!

Arches

We wouldn’t blame you for looking at an archway and thinking that it’s beyond your skills to wallpaper, but with the correct technique it’s surprisingly easy. Like with all tricky jobs, the key is to take your time and keep calm!

  1. Hang the wallpaper down from the ceiling as normal, but when you get to the arch trim the paper in a curve that follows the arch and leaves about an inch of overhang.
  2. Make sure that you cut a straight line across the inside of the arch where the curve meets the vertical so that you can fold the paper neatly around the corner.
  3. Cut notches at 2” intervals along the overhanging paper around the arch to create lots of little wedges.
  4. Glue these wedges to the underside of the arch and smooth down.
  5. If you are wallpapering the other side of the arch repeat this process.
  6. Now measure a precise strip of wallpaper to fit the underside of the arch – make sure that it perfectly covers the little wedges.

Before you paste the measured strip, get someone to help you hold it in place to ensure it’s a good match – and remember to smooth the edges down firmly, but carefully!


Picture hooks


Picture hooks have a tendency to tear your paper if you attempt to lay straight over them so we recommend removing them first. Finding the holes afterwards is a nightmare, but there is a solution – matchsticks!


Simply cut small sections of matchstick and place in the holes where your picture hooks were. As you lay your paper the matchsticks will make little marks that you can use as reference points – but make sure you remove the sticks before smoothing the paper down!


Next month we’ll show you a fool proof way to lay wallpaper around windows – one of the toughest challenges for the DIYer…


Update tiles in your bathroom and kitchen for a new lease of life!

Posted on 27th June 20165th July 2018 by Louise Nelhams
Update tiles in your bathroom and kitchen for a new lease of life!

Giving your kitchen or bathroom a new lease of life is a great way to upgrade your property, but a complete refit can be expensive so that may be out of the question. The simple and much more cost-effective solution is to update tiles already in place for a fast and funky refresh, and this week we’re going to share our top tips on sprucing them up without breaking the bank.


It’s all about the grout


Freshly laid tiles always look beautiful because the grout is clean, but after a period of time high traffic areas start to appear tired or downright dirty. Even regular cleaning of the tiles and grout can’t completely revitalise them and keep that perfect white finish, so the question is, “what are our options?”


Grout pens


Grout pens offer a simple and cost-effective solution to the problem, but it’s still important to do the job properly. Clean the grout beforehand with a toothbrush and abrasive kitchen cleaner – the longer you spend on this step, the longer the effect of the pen will last. There are downsides to pens, however: after a while the nibs wear down and need to be replaced, and the result can look a little amateurish if you’re not careful during application.


Regrouting


For a quick touch-up, grout pens are fine, but if you really want to do the job properly it’s worth buying a grout scraper and getting that old stuff out! Go for a steel scraper because even though they’re not as strong as carbide, they’re a touch softer and less likely to damage your tiles if you slip. You’ll also need a Stanley knife with lots of spare blades for areas the scraper won’t fit. If you have a big bathroom or kitchen to regrout, we recommend a grout grabber – an attachment for a reciprocating saw that will make the job whizz by!


When regrouting mix the grout in small batches because it’s a race against the clock to get it on the wall. As soon as it starts to firm up (between 5-20 minutes depending on the weather and subsequent conditions) begin sponging it down to create a smooth finish.


Tile paint


If you’re not happy with the colour of your tiles, you can also find lots of different coloured tile paint in DIY stores. You can choose to paint alternate tiles, then alternate again on the next row for a checkerboard effect, or simply paint the whole lot – loads cheaper than removing them and replacing them, and much less labour-intensive too.

checkerboard tiles in red and black
Paint your tiles and create a checkerboard effect

Something different?


White is the standard colour for grout, but what if you fancy changing the feel of your room? Switching from white grout to black will give your bathroom or kitchen an art deco look for almost no money – a great style change that will get your visitors talking. Or you may have your own colour scheme in mind.

white tiles with black grout
Go ‘art deco’ with black grout with your white tiles

Another way to update tiles is to use some transfers – there are loads on the market so you’re sure to find something that suits your personal taste.


As long as you take your time, all of these jobs are possible for the enthusiastic DIYer, but, of course, if you think that it might be a little overwhelming you can call a professional… just like us!


Decorating tips to make any space feel bigger

Posted on 29th April 20165th July 2018 by Louise Nelhams
Decorating tips to make any space feel bigger

In your ideal home space is probably not a problem, but not all of us are living in the house of our dreams just yet! That’s why it’s useful to know how to create the illusion of space, turning that tiny little box room or study into an environment you feel happy spending time in. This week we’ll give you our top decorating tips for doing just that.


Keep things light

Try to keep a smaller space as bright as possible by painting your walls with light colours and avoiding dark floorboards or carpets. Dark colours absorb light and make you feel closed in, where light colours reflect the light in the room, making it feel airy and giving the impression of openness and space. Light blues, greens, creams and greys are great choices.


Use stripes!

Every woman knows that the careful use of stripes in clothing can make you appear taller and slimmer, and you can utilise the same approach in your room, by painting stripes on your floor to give the illusion of depth. This trick works with your walls to add the appearance of height too, but don’t try both together unless you want your room to look like a boiled sweet!

room with striped wallpaper
Stripes add height to a small space


Use your ceilings

We rarely think too deeply about how our ceilings are decorated, but in a small space every surface counts. Adding a bolder colour to the ceiling, or stencilling in some conversation pieces (stars look great) will help to draw the eyes upward and further enhance the illusion of spaciousness.


Ditch the overhead lights

Wall uplighters spread around the room work much better in a cramped environment than a single overhead light source, because they give the eyes more focal points to dance around. The bonus is that is also allows you much more control of the ambience too – switch individual lights on and off to adjust the atmosphere from bright and vibrant, to calm and relaxed.


Use colour cleverly

What do you do if you want to give the illusion of height to a room but don’t want to turn the ceiling into a feature? That’s easy: just add a little colour to the very top of your walls to draw the eyes upwards and give the impression of height. You can be as creative as you like with this decorating tip – go for anything from a single block of colour to a softer more organic ‘splash’ effect.

Follow these top decorating tips and you can convert your tiny room from an oppressive and stuffy space into a more open and inviting area that’s a pleasure to use.

Preparing and painting exterior walls the right way!

Posted on 29th March 20165th July 2018 by Louise Nelhams
Preparing and painting exterior walls the right way!

Nothing spruces up and adds perceived value to your property quicker than a new coat of paint, but do it wrong and your house will look woeful instead of wonderful. Many say that this is work best left to the professionals, and it’s certainly true that a seasoned pro will do a more efficient job of preparing and painting exterior walls. But with a little planning and preparation, it’s possible to make a decent go of it yourself – and this week in our blog, we’ll show you how…

Tools for the job

We say it often, but the best way to ensure a professional finish is to use the correct tools for the job. When it comes to prepping exterior walls you will need a medium or stiff wire brush to remove any loose paint and dirt from the walls, a scraper to remove areas of loose brick and cement, and a good quality ladder to ensure that you’re safe. We talked about ladder safety in a previous blog – please read it for reference before you start!

Preparation

Many of the principles we employ for painting interior walls also apply to the outside of your property – like spending at least as much time prepping as painting. Make sure that you remove all loose paint, dirt and masonry with the correct tools, followed by a wash down with detergent if the walls are dirty. Oh, and be sure to deal with any areas of fungus growth etc with a fungicidal wash.

Follow this process up by filling in any damaged areas with exterior filler and rubbing down, along with the existing paint, so that the new paint will adhere correctly. Pay particular attention to areas where the paint has flaked unevenly, rubbing down the edges to smooth them out – a medium grade sandpaper is ideal for this job.


scaffolding on house for painting
An exterior painting job of this size may require a pro!

Sealing and priming the walls

If the existing paint is in decent condition and you’re repainting the same colour it may be possible to skip the priming process, but it’s still best practice to do it and will give the best finished results. For bare walls, a masonry primer is essential to seal and create a surface that will take the final coats well. Use a medium to long piled roller for this job to quickly cover large areas and seal efficiently.

Painting the walls

If you’ve prepared your walls well, painting them becomes a pleasure rather than a chore. Mask up windows, sills and pipes in the same way as you would internally, and begin painting from the top of your house down so that you can better control dribbles. The brush or roller you use is dependent on the finish of your walls: smooth walls require a shorter pile than a heavily textured wall, and very heavily textured walls may necessitate a stippling action with a large brush (it may be better to leave that to the pros!).

If you follow our advice your house will soon be looking fantastic, but, of course, if you don’t fancy all this hard work yourself you can give us a call – we’ll be happy to do it for you! 


Posts navigation

Older posts
Newer posts
  • Terms & Conditions
  • Privacy & Cookies
  • © Rushton & Co. Ltd. 2013
  • Painting Contractors
  • About
  • Contact
  • Sitemap
  • Tradespeople Link Up
This website uses cookies to improve your experience. We'll assume you're ok with this, but you can opt-out if you wish.Accept Read More
Privacy & Cookies Policy

Privacy Overview

This website uses cookies to improve your experience while you navigate through the website. Out of these cookies, the cookies that are categorized as necessary are stored on your browser as they are essential for the working of basic functionalities of the website. We also use third-party cookies that help us analyze and understand how you use this website. These cookies will be stored in your browser only with your consent. You also have the option to opt-out of these cookies. But opting out of some of these cookies may have an effect on your browsing experience.
Necessary
Always Enabled
Necessary cookies are absolutely essential for the website to function properly. This category only includes cookies that ensures basic functionalities and security features of the website. These cookies do not store any personal information.
Non-necessary
Any cookies that may not be particularly necessary for the website to function and is used specifically to collect user personal data via analytics, ads, other embedded contents are termed as non-necessary cookies. It is mandatory to procure user consent prior to running these cookies on your website.
SAVE & ACCEPT

WhatsApp us