Skip to content
  • Home
  • About
  • Services
    • Interiors
    • Exteriors
    • Restoration
    • Spray painting
    • Commercial
  • Blog
  • Gallery
  • Contact
-->
  • Home
  • About
  • Services
    • Interiors
    • Exteriors
    • Restoration
    • Spray painting
    • Commercial
  • Blog
  • Gallery
  • Contact

Category: Uncategorized

Where to buy your decorating supplies

Posted on 29th November 20175th July 2018 by Louise Nelhams
Where to buy your decorating supplies


We don’t know if it’s true that a bad workman always blames his tools, but a professional decorator never does because they know that stocking up on decorating supplies from reputable dealers is essential. This month we’re going to share our definitive list of suppliers, so you can be sure that your gear isn’t going to let you down!

Decorating supplies online

We used to be limited to local suppliers, but with so many merchants moving the bulk of their business online, it’s now possible to order exactly what we need from a host of great companies with huge stock levels and fantastic customer service. These are three of our favourites:

  • Trade1st – when it comes to quality products at extraordinary prices, there’s no website that comes close to Trade1st.co.uk. They work on a small mark up/high turnover model to give you the best price possible, and stock everything they show on their website, so you can be sure that they’ll have what you order.
  • My Paintbrush – this award-winning trader of decorating supplies has been providing pros and keen DIYers with top-quality gear since 2012. They have a proud record of excellence and work to freshen up the industry by bringing new products to the UK on a regular basis.
  • Decorating Direct – since opening for business in 2000, Decorating Direct Ltd has been one of the most reliable and well-priced vendors around. They carry a huge range of stock, have a friendly and reliable staff, and offer free delivery on orders over £45.

High street suppliers

Of course, there are some high street suppliers that you can rely on for your gear if you’re in a hurry. These are our favourites for all budgets:

  • B&Q – what can we say about B&Q that you don’t already know? They’ve got us out of a fix on more than one occasion, and we thoroughly recommend them if you need something quickly. They don’t have the same stock levels as some of the big online stores, so always ring ahead if you’re in a rush or don’t fancy a wasted trip.
  • Screwfix – the first stop for professionals from all trades, Screwfix is also a great place to pick up decorating suppliers for the DIYer. It works the same as Argos – you look through the catalogue, fill in a slip and pay at the counter, where the staff are always helpful and knowledgeable.
  • Wilko – if you’re on a tight budget, Wilko has a great selection of wallpaper, paint and supplies, including their own brand that is actually pretty good!

Finding quality decorating supplies is a key step to a well planned DIY job, and we think that this list will get you up and running in no time at all. If, however, you’re not sure how to proceed, you can give us a call for some friendly advice or a quote to have your job done by the pros.


Categories

  • budget
  • colour trends
  • coving
  • decorating
  • decorating tips
  • decorator's varnish
  • DIY
  • DIY Projects
  • exterior decorating
  • How-to
  • Interior design
  • lining paper
  • paint brush
  • paint drying times
  • painting
  • painting exterior walls
  • painting fresh plaster
  • painting woodwork
  • repairing a concrete window sill
  • shabby chic
  • shabby chic decorating
  • stained glass
  • Stripping wallpaper
  • Uncategorized
  • varnish
  • wallpaper
  • wallpaper designs

Recent Posts

  • Decorating Trends for 2021
  • Bringing Life Into Your Home
  • Five Ways To Make Your Feature Wall Flourish
  • The Psychology Of Colour, And How To Use It!
  • Need Better Productivity? Redecorate Your Office!

Sprucing your home up this spring – exterior decorating projects

Posted on 29th March 20175th July 2018 by Louise Nelhams
Sprucing your home up this spring – exterior decorating projects

Spring has finally sprung, and it’s the perfect time to make a start on those DIY jobs that make a massive difference to how your home looks and feels – especially those exterior decorating projects!

fence painting for a spring exterior decorating project

This month we’re going to give you our top tips on sprucing up the exterior of your home so that you’re ready to welcome friends and family around for a BBQ or garden party.

Revitalise your house with these 6 exterior decorating projects…

  1. Paint your garden fence: a new colour will lift the whole exterior of your property, so rub that fence down with a wire brush and apply a couple of coats of wood treatment. Make sure that you use a soft brush to remove any loose dirt before applying the first coat, and then choose something like Cuprinol Shades. Easy to apply and offering many colour options, it’s ideal for the DIYer and provides 5 years of protection.
  2. Paint your gate: Is your metal gate looking sorry for itself? A rub down with some wire wool and sandpaper to remove any rust and dirt will prepare it perfectly for some metal paint. Lay a sheet down to protect the floor, give it a good clean with sugar soap, and then apply primer. Once dry you can use a small brush to apply two coats of metal paint.
  3. Paint your doorstep: A coat or three of decent masonry paint can transform a worn doorstep and give your house a completely new look. As with all masonry painting, prep first with a good sand and clean before applying the paint.
  4. Paint your window sills and surrounds: Old Victorian terrace houses often have concrete window sills that look fantastic when painted. Rub them down with wire wool, fill in any holes with ready mixed stone repair and rendering, and then apply primer and paint. Use the same colour and technique for the arches and surrounds.
  5. Jet wash your paths: A year’s worth of muck and grime will make any exterior paths or driveways look terrible, but a day with a hired jet wash and some elbow grease and your paths will soon look sparkling clean!
  6. Paint your house: A fresh coat of paint to your house’s exterior will make it look like a new property. It’s best to stick to fairly simple and neutral colours in our climate rather than attempting to bring a little continental sparkle with a brighter colour – we simply don’t have the quality of light to pull that off successfully so white works best.

None of these jobs should be too much for the brave DIY enthusiast, but we’re always here to offer some friendly advice. Some exterior decorating projects can feel a little overwhelming for the novice though, so if you live in Leeds, Harrogate or surrounding areas, please feel free to contact us for a quote!

How to choose the right paint brush

Posted on 23rd December 20155th July 2018 by Louise Nelhams
How to choose the right paint brush

Quality

As professionals, we always recommend buying the best quality you can afford, but with the advances in manufacturing, it’s now possible to buy a high-quality mid-range brush that will do a great job for the DIYer. As a general rule, go for a less absorbent synthetic brush for water-based paints and a natural bristle brush for solvent-based products because it will hold the paint or varnish better and prevent tramlines.

If you’re on a budget you can buy some great all-rounders with a mixture of both bristles.

Shape

In much the same way that the correct bristles make the job easier, choosing the shape that fits the task will help you to produce an excellent finish and limit the frustration that’s sure to occur if you choose the wrong type! Let’s have a quick look at the choices:

  • Masonry brush – big and tough for dashing in large, rough areas
  • Angled sash brush – perfect for cutting in corners and getting a good finish around trim areas
  • Radiator brush – instead of removing the radiator, or pretending the back doesn’t need painting, you can use one of these long-handled brushes designed for the job
  • Fence and shed brush – designed for large sweeping strokes, this hefty brush can be loaded with loads of paint for quick coverage
  • Square cut brush – the perfect all-rounder! Buy them in various sizes to cover a multitude of jobs
  • Round brush – this is the pro’s favourite because, much like an artist’s paint brush, it gives control over the size of the stroke. It does require a higher level of skill to use correctly though

Size

With most brushes falling into the 1-5 inch range it’s best to choose one that is slightly narrower than the width of the stroke you wish to make – especially important for any strip of wood that has an overhang because a brush that’s too wide will overlap the edge and cause runs and drips to form.

We hope that this simple guide on how to choose the right paint brush goes a long way to helping your decorating projects go as smoothly as possible. If you’re in any doubt, call the experts in to do the job – that’s us!


Lining Paper – choosing the right type for the job

Posted on 27th July 20155th July 2018 by Louise Nelhams
Lining Paper – choosing the right type for the job

Despite the revival of patterned wallpaper, many homeowners still prefer to paint their walls. It’s often felt that a simple lick of paint, rather than a busy wallpaper, provides a blank canvas which offers more creative design options – allowing them to change the feel of a room by adding curtains and cushions, for example, in complementary or accented colours. Unless you live in a new build or have had your walls plastered by a master plasterer, the best finish for your paint job will always be achieved by using lining paper, because it hides the multitude of small imperfections and cracks that can develop in older properties.

Lining paper can also be used to provide a soft and even base layer for your patterned wallpaper ─ it’s definitely recommended for very expensive papers, as it helps to achieve a much more professional finish.

What is it exactly?

Unlike patterned wallpapers, lining paper is produced from wood pulp, and as with most things, you tend to get what you pay for. Budget papers are usually made with a mixture of recycled paper and virgin wood pulp, and although it’s possible to buy good quality mixed papers, we would definitely recommend professional quality papers made from 100% virgin wood pulp.

Choosing the correct grade for the job

Whilst it’s important to choose a quality paper, it’s much more crucial that you pick the correct grade for the job:

  • 800-1000 grade – these are ideal for providing a really nice finish on new plaster that has no imperfections, or for preparing walls for patterned papers.
  • 1200-1400 grade – probably the most popular all-rounder, 1200 and 1400 grade paper cover more imperfections, making them popular with professional decorators and DIYers alike.
  • 1700-2000 grade – ideal for walls that are in poor condition, and for old houses where the walls have lots of movement.

It’s important to note that as the grade of paper increases in thickness, it becomes much more difficult to handle. 1700-2000 grade papers require long soaking times and careful mixing of adhesives to stick correctly to the wall ─ they’re also much trickier when it comes to papering around corners.

Female decorator hanging lining paper

Lining paper is not a magic wand

Lining paper is a great tool for home decorating, but it’s not a miracle worker. It will cover up small imperfections, but if you want the best finish possible, you must prepare your walls correctly. Taking a little extra time to fill any holes and sand down major imperfections will be time well spent.


Expert tips for painting walls – the ultimate guide

Posted on 29th January 20155th July 2018 by Louise Nelhams
Expert tips for painting walls – the ultimate guide

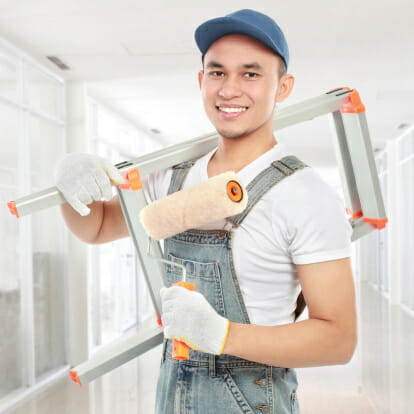
You’ve all heard the phrase ‘if the job’s worth doing, it’s worth doing it properly’, so rather than just slapping up some paint and hoping for the best, why not take a few minutes to read our top tips for painting walls the professional way?

Painting your walls (and ceiling) is a quick and easy way to refresh your décor without spending too much cash – but if you don’t want to hire a professional decorator, then it’s definitely worth investing a bit of time to ensure you get a good finish nonetheless.

Our top 10 tips for painting walls so they look perfect

  1. General preparation

However careful you are, paint has a habit of occasionally getting where you don’t want it to go, so unless you’re going for the Jackson Pollock look, it’s worth removing or covering anything that you don’t want to get a covering! Use dustsheets or plastic sheeting to cover floors and large pieces of furniture – which should be shifted into the middle of the room. Don’t forget to stick on some old clothes too.

If you want to get a really professional result, you should also invest in some decorators caulk to make good any gaps between skirting boards, door/window frames and the walls you’re about to paint.

  1. Pre-painting wall prep

This is the bit that most people skip, but before painting, you really should prepare the surface properly. If the surface is just been plastered, then use sandpaper to smooth off any blemishes or rough patches. Then, regardless of the surface, you should give them a quick wash down with some sugar soap (household detergent or soapy water will work just as well). Give them another wipe over with plain water and make sure they’re fully dried before applying any paint. When painting on bare plaster, you’ll need to apply a primer or basecoat to stop your lovely paint soaking straight into the walls.

Once cleaned, you can get the masking tape out and mask off any edges where walls/ceilings meet, or frames/skirting, to keep your lines neat and tidy.

  1. Tools of the trade

You’ve got three choices about how to cover the wall: paintbrushes, paint pads or rollers. You’ll definitely need a couple of paintbrushes, but for larger areas, a roller is probably the best choice. You can get specialist ‘cutting in’ paintbrushes which are angled to help you get a tidy finish, or you can use a ½ or 1” brush instead.

Don’t skimp on price here – a better quality brush will last longer, cope with washing and drying and you’ll be less likely to spend time removing stray hairs that have worked their way out and onto the walls. When choosing your roller, go for a higher nap (thickness) if the surface is rough or uneven, or a lower nap if you have nice smooth walls. Unless you’re removing the radiators completely, you’ll also need to purchase a radiator roller so that you can get the paint down behind them.

  1. The order of things

If you’re painting the room from top to bottom, you need to start at the top! Always do your ceiling first, otherwise you risk splashing paint on the walls. While this isn’t a problem if you’re using the same colour throughout, it’s still the best place to start, as you won’t be at risk of smudging or marking the walls with your elbows when working on the ceiling. Once the ceiling has the required number of coats, you can start on the walls themselves.

Your woodwork should always be the last thing you paint – wait until the emulsion is fully dry and then use masking tape above the skirting line to help give you that neat, straight edge. You can find out about preparing your wood for painting here.

  1. Cutting in

This is the bit that people worry about most, but providing you take your time, there’s no reason why it has to be a stress. Using the edge of a small paintbrush or specially designed angled brush, use firm, steady strokes to brush the paint along the lines where the wall meets the corner of another wall or along the edge of the ceiling. This is where masking tape can help too, but it’s not completely necessary: it depends on whether you’re using different colours or shades the different walls. Follow the same process around door and window frames, and skirting boards too.

  1. Loading and pressure

First of all, it’s really important that you don’t overload your brush or roller. When working with a paintbrush, make sure you only dip the bristles about a third of the way down into the paint, removing any excess before you apply. You can do this using the side of the tin, but a better method is to put a large, strong elastic band over the paint pot which you can use to wipe your brush against – this keeps the side clean and will stop the lid from welding on when you’re done!

With rollers, carefully pour some paint into the tray and roll the roller down into the paint, using the higher part of the tray to distribute it more evenly.

Use a fairly light, even pressure and work in all directions to get a smooth coat.

  1. How much is enough?

The number of coats you need will depend on the surface and the paint itself. If you’re covering a darker colour with a lighter one, then you’ll need at least two coats. However, you can buy specialist one coat paint that should do exactly what it says on the tin providing it’s not a very light colour over a very dark one.

  1. Patience

It’s fair to say that you’ve probably got more interesting things to do than spend days painting the walls – but if you want to get a good, tidy finish, you may have to exercise a little patience! Make sure that the previous coat is completely dry before you start applying the next. Follow the instructions on the tin and air the room well while you work.

  1. Cleaning up

Your brushes and roller should be good to use again – but only if you look after them properly. For water-based paints, such as emulsion, you can use regular soap/dishwashing liquid and hot water for cleaning. Remove any excess by painting onto some old newspaper first and once clean, pat them dry with an old rag or paper towel. If you’ve used oil based paints, such as gloss, you’ll need to use turps or white spirit to wash the brushes out. You can stand your brushes in a jar for a short while before rinsing them through with clean spirit or turps, but don’t leave them too long or you’ll damage the bristles.

  1. One last tip…

If you’ve used several similar shades over the room or throughout the house, it’s a really good idea to clearly label your paint pots with the room name and whether it was used on the ceiling, or which walls. This makes it much easier if you need to do any touch ups in the future. When storing your paint, make sure the lid is completely sealed.

We hope these tips for painting walls have been useful to you – but if you really can’t bear the thought of doing it yourself, and you live in the Leeds or Harrogate area, you can always give us a call and we’ll come along and give you a no-obligation quote!

Top 10 Essential Decorating Tools You Can’t Do Without!

Posted on 27th August 20145th July 2018 by Louise Nelhams
Top 10 Essential Decorating Tools You Can’t Do Without!

They say that a bad workman always blames his tools, so we’ve decided to give you a helping hand at the outset so you have no excuses! Our low down on the top 10 essential decorating tools will give you a professional’s insight into the things you need to ensure your DIY project goes smoothly. One important thing to bear in mind when shopping for decorating provisions is that budget isn’t always best! There are certain decorating peripherals that are well worth spending a little more money on – especially if you’re planning on an ongoing project covering several rooms. Our top 10 tools and accessories for DIY

  1. Dust sheets, rags and cloths – Decorating can be dirty work, and it’s much better to be concentrating on the job in hand rather than constantly worrying about the mess you’re making – there’ll be time for clearing up at the end of the day. Old sheets, quilt covers, towels and curtains can all be used as a substitute for proper decorating dustsheets if you have some spare and don’t want to stick your hand in your pocket. These items are imperative if you want to protect floors, furniture and other items – just make sure you’re happy for them to end up covered in dust, paint and paste.
  2. Quality paint brushes and rollers – While you can pick up some real bargains when it comes to brushes, we’d always recommend going for a mid range or higher quality paintbrush where possible – this is especially important for glossing, as you don’t want to end up with loose strands in your paintwork! Invest in a good set of varying sizes, from half an inch up to 4 inches so that you can choose the right brush for the area to be covered. Cheap paint rollers are okay if you’re covering a flat wall, but it’s definitely worth considering paying a little more for a higher quality product if you’re painting over embossed wallpaper or really want to get a smooth and professional finish.

    Quality decorator's paintbrushes
    Good quality paint brushes are a vital part of your kit
  3. Masking tape – When you’re painting skirting boards, door frames, window frames or architraves, masking tape is definitely the decorator’s best friend! Use it to cover the edges around the area you’re going to paint to ensure clean, neat lines and to save time tediously painting inch by inch.

    Decorator masking off skirting boards
    Use masking tape for clean lines when you paint
  4. Scrapers – Scrapers were not all created equal, so make sure you have a couple of different sizes to suit different purposes. Use a narrow bladed scraper for opening and clearing out cracks in plaster and applying small amounts of filler, and use a wider blade for wallpaper scraping and cleaning off old paste once wallpaper has been removed, or for filling larger holes.
  5. Stanley knife – You’ll be surprised how often this handy little addition to your decorator’s kit comes into play! You can use it for opening packets, cutting off the ends of silicon tubes or decorators caulk and for cutting away or loosening stubborn bits of wallpaper along skirting edges and door frames.
  6. Pliers (and a screw!) – Both of these items are incredibly useful when preparing your walls before papering. Pliers can be used for pulling out nails and picture fixings and that screw will come in handy for extracting embedded rawl plugs before you start hanging your paper.
  7. Soft brush and sponge – If you’re hanging wallpaper, then these accessories should be a standard part of your decorating kit. Use them to smooth out lumps and bubbles from your wallpaper without damaging your hard work.
  8. An old dining chair cushion or gardeners knee pad – Anyone who’s spent any length of time kneeling on the floor to paint those dastardly skirting boards will vouch for the fact that it’s not a very comfortable experience! Having a small cushion or pad to rest on can really take the strain off your poor joints, and can double up as a seat on your tea break if you’re working in an unfurnished area.
  9. Steamer– Stripping wallpaper isn’t much fun, but it’s made eminently easier by using a steamer rather than a wet rag and willpower! A steamer will help you clear the walls in super-fast time so that you can get on with the fun part.
  10. Empty tubs – Having a couple of spare plastic tubs or empty tins will make painting and pasting much easier for you. It’s better to carry a portion of your paint in a smaller receptacle than heaving around a monster can of emulsion. It will reduce the possibility of spillages and you can also use one for a small amount of paste to leave at the top of your ladder while working on seams and edges.

How to prepare your walls for wallpaper

Posted on 31st July 20145th July 2018 by Louise Nelhams
How to prepare your walls for wallpaper

So you’ve chosen you’ve chosen your lovely new wallpaper and you want to get hanging, but before you get out the paste and pasting table, you need to make sure you’ve got a good, blank canvas. Follow this simple guide to prepare your walls for wallpaper and you’ll be sure of an expert finish!

Decorating isn’t everyone’s favourite job, especially the prep worked involved – but as they say, if a job’s worth doing, it’s worth doing properly and when it comes to wallpapering, never has a truer word been spoken!

Taking time to prepare your walls for wallpaper can be arduous, but it’s essential if you want to achieve a professional finish. It will make hanging your paper much easier, ensure that it stays put and that it won’t be spoiled by unsightly lumps and bumps. Granted, it’s not an exciting job, but it’s pretty easy when you know how… So here’s a quick guide to preparing your walls for wallpapering, the professional’s way.

Step 1 – Strip!
Not a personal statement you understand, but we are, of course, referring to any existing wallpaper. No shortcuts – you need to remove EVERY trace of old paper. Use a steam stripper along with the traditional scraper if you can and get every layer off.

If the current wallpaper has been applied directly to plasterboard, be extra careful not to damage the surface by gouging through the paper or applying too much steam.

Preparing your walls for wallpaper
Not much fun but an essential part of the wallpapering prep!

Step 2 – Smooth
Gently scrape off any remaining bits of wallpaper or paint with a scraper and then buff and smooth the surface with a sanding block.

Step 3 – Clean
If there’s any mould present, you can wash down these areas with a bleach solution. Otherwise, use sugar soap to wash down the walls, removing any paste residue, dirt and stubborn bits of liner or paper.

Step 4 – Plaster
Often when you remove old paper, some of the plaster underneath will be chipped or flaked. Don’t just ‘paper over the cracks’! Pick out any areas that are coming loose or have become powdery and then repair using filler. Also pay attention to the tops of skirting boards and around door frames too – if you’re left with any gaps after your initial prep work, you can use flexible sealant on these areas to make them good. Once the filler has ‘gone off’, or set, you can use your sanding block again to smooth the repaired areas

Step 5 – Sizing
Apply a primer/sealant or watered-down paste solution with a brush or roller over the entire area to be decorated. This provides a better base for hanging your wallpaper and will make sure it stays firmly fixed in place – it will also make pattern-matching easier, as you’ll be able to slide the paper into position without risk of tearing.

Step 6 (optional) – lining paper
Hopefully your walls will now be fully prepped for hanging your gorgeous wallpaper, but if you have lots of newly repaired and plaster-filled areas or visible hairline cracks, it’s worth considering a layer of lining paper before you put up the good stuff! Once your lining paper is up, leave to dry overnight and then tomorrow, you can get cracking with the real thing!

New wallpaper hung on ready prepared walls
The hard work will be worth it to get a finish like this!

How Can I Make A Room Feel Bigger?

Posted on 8th May 20145th July 2018 by Yasmin Roworth
How Can I Make A Room Feel Bigger?

As we work in many homes and work spaces within Leeds we get asked the same question regularly: ‘How can I make a room feel bigger?’

We’ve put together 4 simple tips to help you create the illusion that your room is bigger than it actually is.

You don’t have to use all the ideas at once, try one or two and see the big difference it makes.

1. Use light colours.

When painting the room use light colours. Colours such as creams and whites will make the room feel airy, brighter, cleaner and less confined giving you the impression that it is bigger.

2. Add Mirrors.

Adding a large mirror or a couple of smaller ones will help you make your room feel bigger as they will reflect light around the room. If you don’t want to invest in a large one you could consider adding smaller ones that blend in with the room. For example you might use coasters on your coffee table that contain small mirrors.

 3. Tidy up.

It’s easy over time to let clutter and every day belongings gather in a room, we’re all guilty of it especially if the children have their toys and knick nacks your lounge. Have a really good sort out of what’s in your room and if you don’t need it either dispose of it or put it in the garage.


4. Add some contrast.

If you have used tip number one and have used a light colour pallet on the walls then you might want to add a splash of colour contrast in your accessories. You might want to use lamps, cushions and even prints on the wall. Colours that work lime green, blue or even a dash of plum look really good.

Where will you start? If you need some help to make a room feel bigger, want some specific ideas or would like to chat all things decorating visit our main website to contact us today.

What Should I Ask a Decorating Company?

Posted on 10th April 20145th July 2018 by Yasmin Roworth
What Should I Ask a Decorating Company?

What should I ask a decorating company before they work for me? 

If you’re considering having some painting or decorating work done in or around your home, you should always ensure you ask the decorating company you select a few questions for your own peace of mind and knowledge.

We love what we do & as we work, in Leeds, we meet many homeowners like yourself and would like to offer our top tips in selecting the right painting and decorating company for you.

So here are our 3 important questions you should ask a painting & decorating company before they work for you.  

1.Do you have insurance?

Reputable painting and decorating companies will carry fully public liability insurance. This covers against accidental damage also.  Reputable painting and decorating companies will not mind showing you a copy of their insurance certificate either in print, email or even by displaying it on their website.

For example you can view our insurance documents by clicking here 

2. Can I view some testimonials?

Ask your chosen contractor if you can view testimonials or customer comments from past clients. You can gage your own opinion on the company and form your own opinion on if this is the correct company for you.

Most companies will display customer comments on their website & some may have written ones in a portfolio.  You can view our lovely testimonials.

With the Internet ever expanding you can also do your own research online. It’s also worth making note that social media now is classed as the ‘new word of mouth’ and past customers of your chosen painter and decorator may display their views there.

We use our Facebook page and Twitter  very regularly to chat and share what we are working on with our customers.

3. Can I have a written quote?

Different companies and tradesmen do things in different ways. Some may quote you over the telephone, some may come to view your project and quote verbally on the spot, some may come to view your project & go away to work out the quotation.

No matter which method you receive your quote that it’s confirmed in writing and includes the description of all the works you have discussed.

For example when we quote we:

  1. Come to view your project and discuss your needs & wants.
  2. Go away to work out your quotation.
  3. Send your quotation via post or via email for you to read through.


Don’t ever be afraid to ask questions about your chosen painter & decorators questions about the works, genuine contractors will be more than happy to help you.

Call us: 0113 808 1192 or 07958 071355.

Visit our main website www.rushtonandcompany.co.uk 

Email:

  • Terms & Conditions
  • Privacy & Cookies
  • © Rushton & Co. Ltd. 2013
  • Painting Contractors
  • About
  • Contact
  • Sitemap
  • Tradespeople Link Up
This website uses cookies to improve your experience. We'll assume you're ok with this, but you can opt-out if you wish.Accept Read More
Privacy & Cookies Policy

Privacy Overview

This website uses cookies to improve your experience while you navigate through the website. Out of these cookies, the cookies that are categorized as necessary are stored on your browser as they are essential for the working of basic functionalities of the website. We also use third-party cookies that help us analyze and understand how you use this website. These cookies will be stored in your browser only with your consent. You also have the option to opt-out of these cookies. But opting out of some of these cookies may have an effect on your browsing experience.
Necessary
Always Enabled
Necessary cookies are absolutely essential for the website to function properly. This category only includes cookies that ensures basic functionalities and security features of the website. These cookies do not store any personal information.
Non-necessary
Any cookies that may not be particularly necessary for the website to function and is used specifically to collect user personal data via analytics, ads, other embedded contents are termed as non-necessary cookies. It is mandatory to procure user consent prior to running these cookies on your website.
SAVE & ACCEPT

WhatsApp us